Tutorial: How to Use VansPortrait
VansPortrait is a converter powered by AI, which enables you to turn photo into line drawing in a matter of seconds. With a little help from the tutorial, you will know how to use VansPortrait to create realistic, compelling anime portraits or sketches. Let’s get started! Besides that, more people also seem to be interested in AI Face Generator. You can know more from the link.
How to use VansPortrait?
Step 1: Go to VanceAI
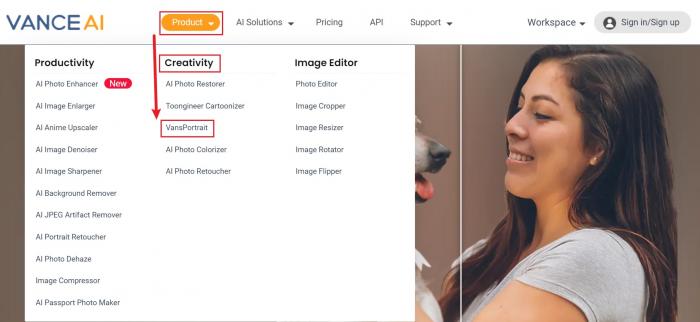
Users need to come to the homepage of VanceAI by clicking on VanceAI.com. After that, they should click Product, then Creativity and finally VansPortrait. Apart from that, there comes some fancy AI Portrait Generator, making fancy selfies at a fast speed. Get to know more about it.

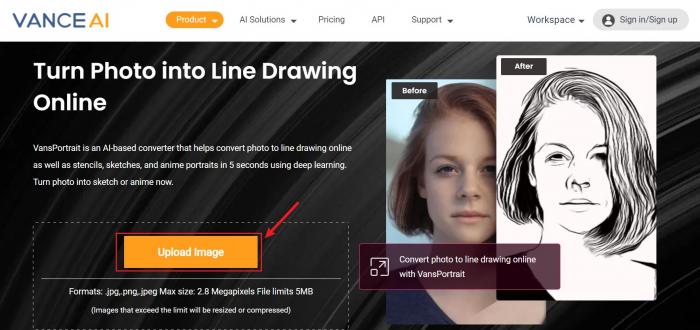
Clicking on line art generator leads you to the homepage of the product as shown below. Now it’s better to hit Upload Image, after which you will see the workspace of VansPortrait. In another way, trying cartoon styles by using an AI cartoon generator is also a great idea.

Step 2: Choose a proper mode on Workspace
On the workspace, VansPortrait gives you two types of sketchs among which you are free to choose the one you like. Then just hit Start to Process and the tool will show you the best result in a few seconds.

Step 3: Download sketch
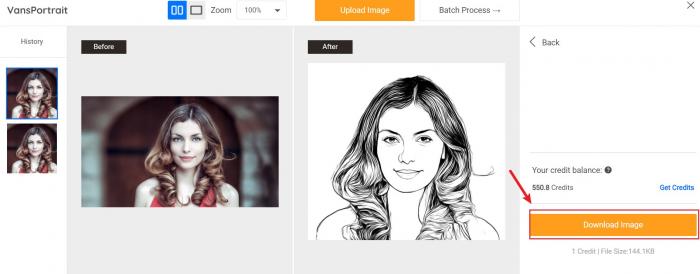
The workspace supports you to compare the sketch to the original image. Obviously VansPortrait does a good job of converting photo to outline drawing through previewing the before-after comparison. Hit Download Image to save your lifelike sketch. More interestingly, there are also some popular Vtuber Maker which use similar technology. Try it if you like.


